Embracing the Warmth and Versatility of DIY Pine Flooring
Related Articles: Embracing the Warmth and Versatility of DIY Pine Flooring
Introduction
In this auspicious occasion, we are delighted to delve into the intriguing topic related to Embracing the Warmth and Versatility of DIY Pine Flooring. Let’s weave interesting information and offer fresh perspectives to the readers.
Table of Content
Embracing the Warmth and Versatility of DIY Pine Flooring

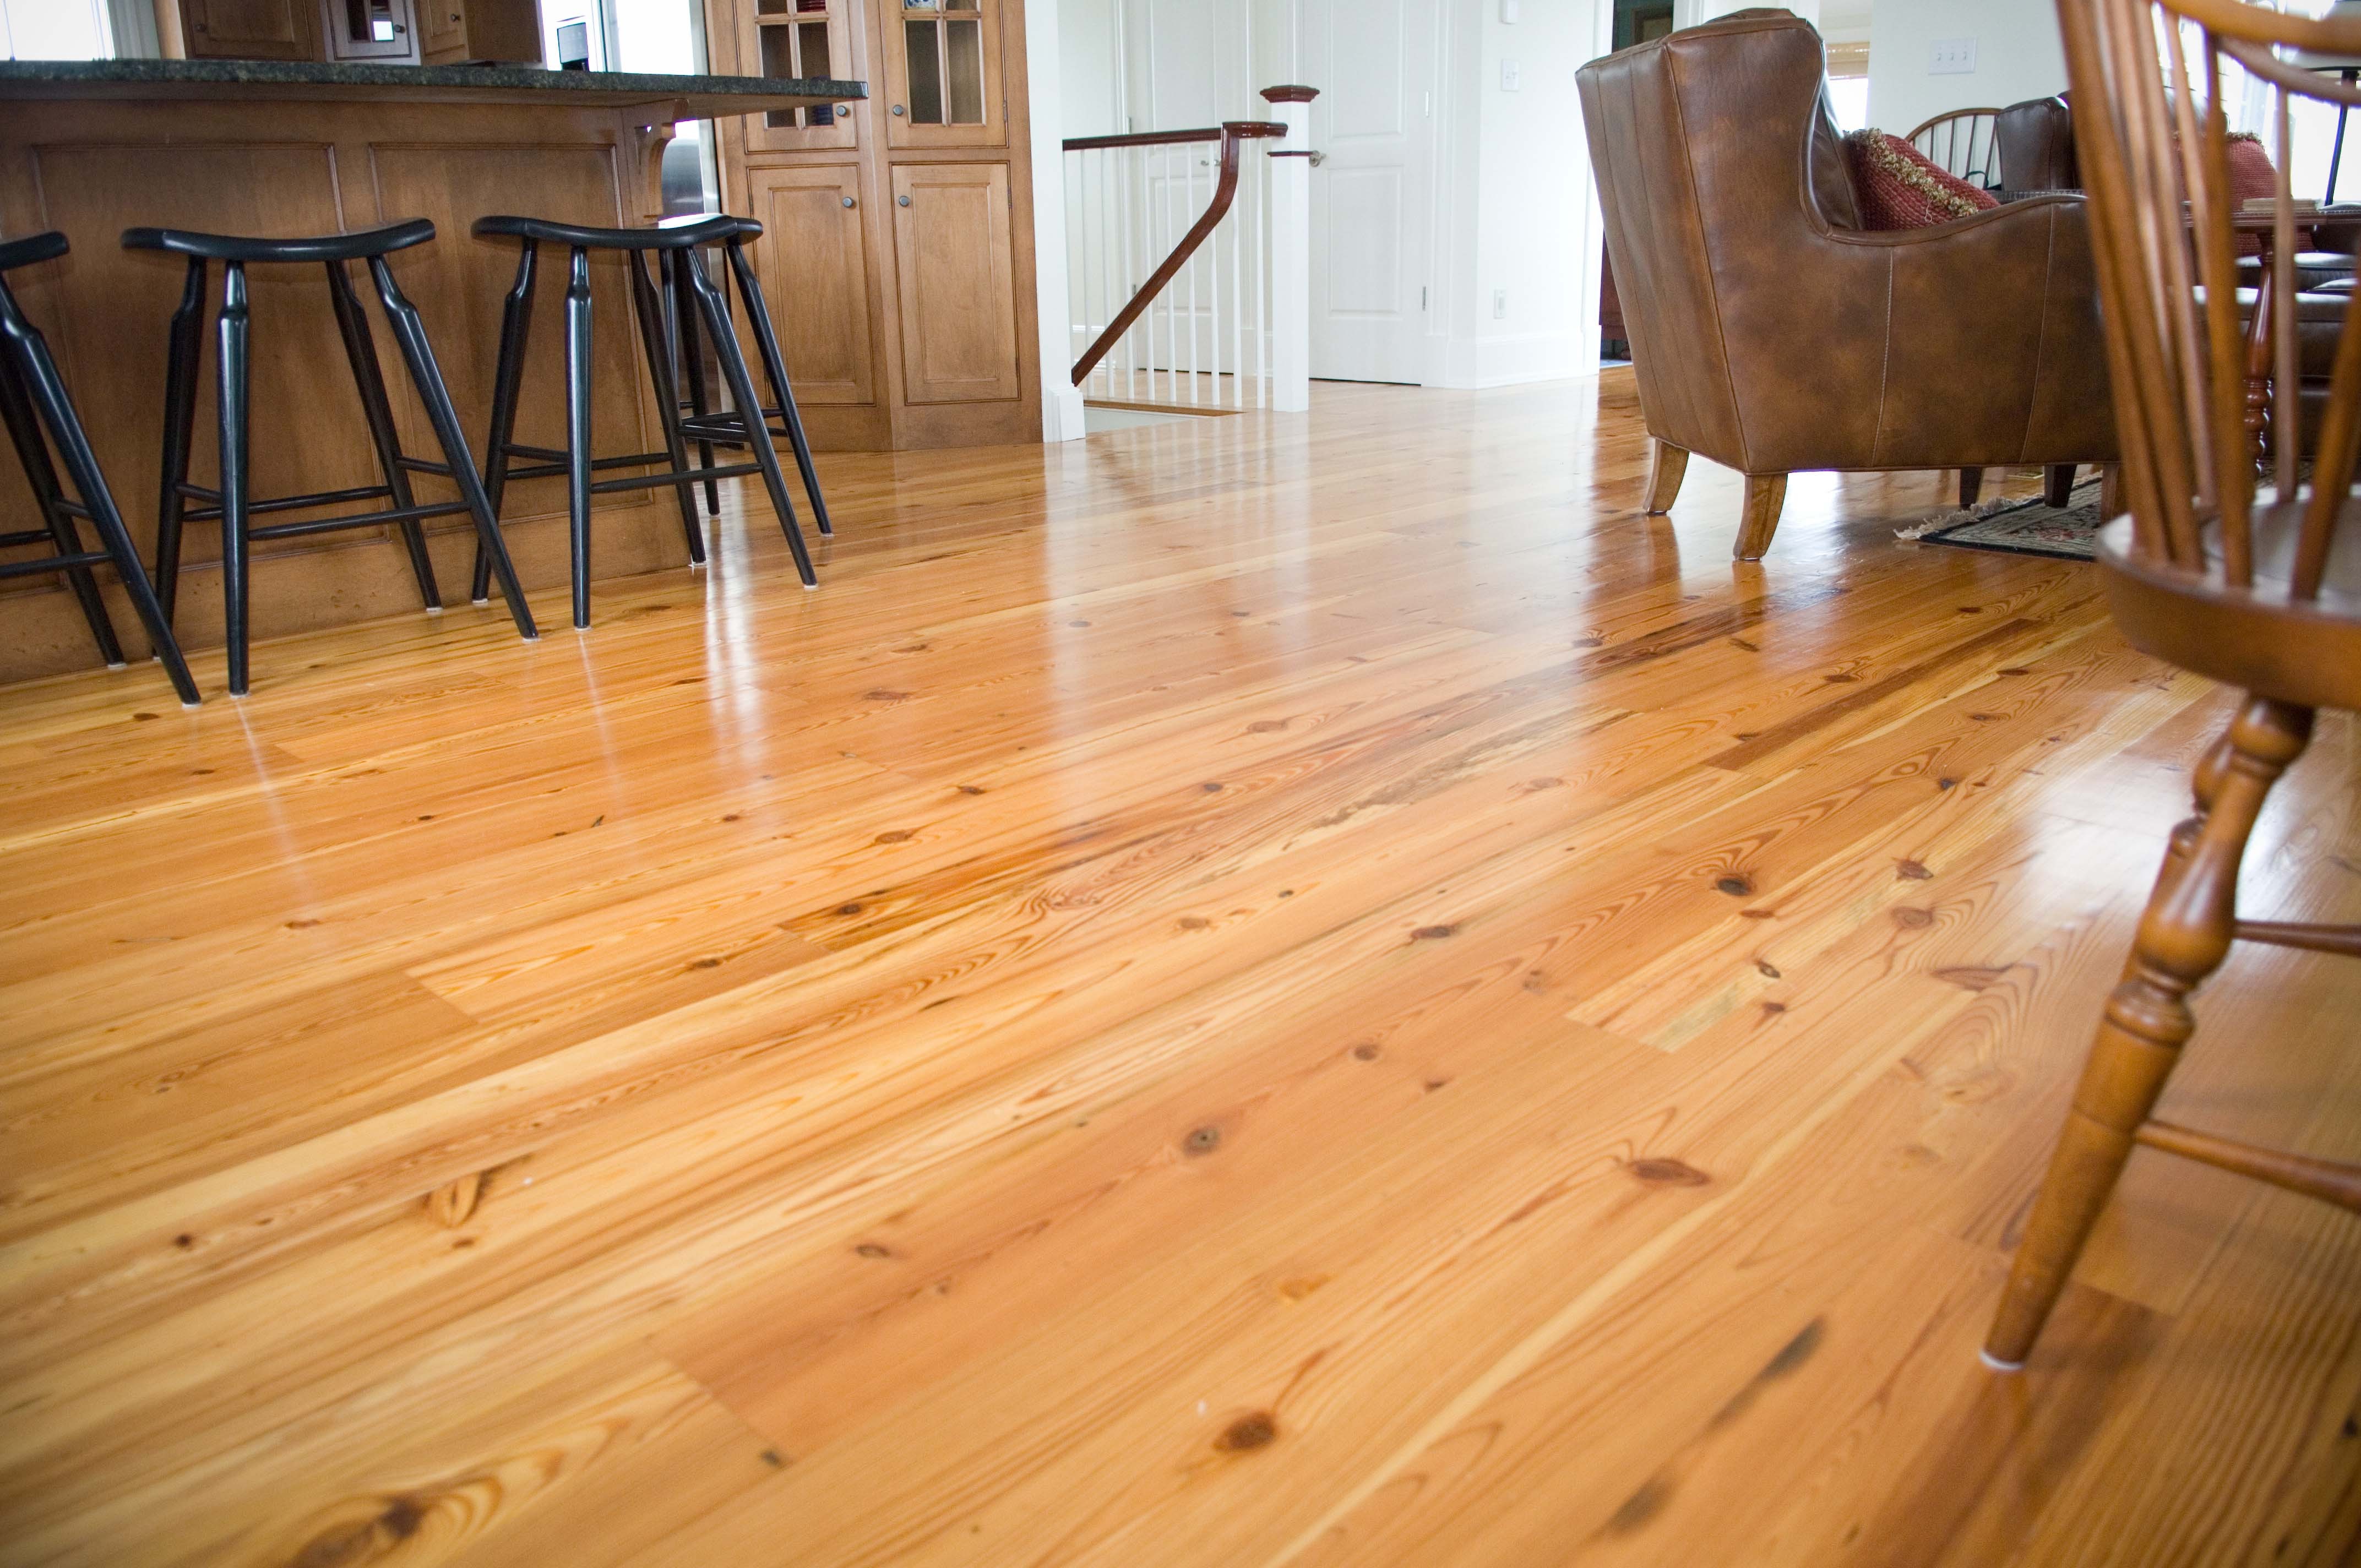
Pine flooring, with its natural beauty and affordability, has long been a popular choice for homeowners seeking to create a welcoming and inviting atmosphere. The inherent warmth of the wood, coupled with its versatility in design and finish, allows for a wide range of aesthetic possibilities. While professional installation is always an option, undertaking a DIY pine flooring project can be a rewarding experience, offering a sense of accomplishment and significant cost savings. This article explores the key aspects of DIY pine flooring, from material selection and preparation to installation techniques and finishing touches.
The Allure of Pine Flooring
Pine, a softwood readily available in various grades and sizes, possesses several characteristics that make it an excellent choice for flooring:
- Natural Beauty: The distinctive grain patterns and warm hues of pine create a timeless and classic aesthetic. The knots and variations in color add character and charm to any space.
- Affordability: Compared to hardwoods, pine is generally more budget-friendly, making it an accessible option for homeowners on a tight budget.
- Versatility: Pine can be stained or painted to achieve a wide array of colors and finishes, adapting to various design styles.
- Workability: Pine is relatively soft and easy to work with, making it suitable for DIY projects, even for novice woodworkers.
Choosing the Right Pine for Your Project
The selection of pine for flooring is crucial, as it directly impacts the final look and durability of the floor. Several factors should be considered:
-
Grade: Pine flooring comes in various grades, each with specific characteristics.
- Select and Better: These grades feature clear wood with minimal knots, offering a more uniform appearance.
- Common and No. 1 Common: These grades include knots and variations in color, adding character and rustic charm.
- No. 2 Common and No. 3 Common: These grades feature larger knots and more pronounced color variations, offering a more rustic and distressed look.
- Width and Length: Pine flooring planks come in various widths and lengths, allowing for flexibility in design and installation. Wider planks create a more spacious feel, while shorter planks may be more suitable for smaller spaces.
- Thickness: Thicker planks offer greater durability and stability, while thinner planks are lighter and easier to install.
- Species: Different pine species, such as White Pine, Yellow Pine, and Ponderosa Pine, have unique characteristics in terms of grain pattern, color, and hardness.
Preparing for the Installation
Before embarking on the installation, meticulous preparation is essential for a successful and long-lasting floor:
- Subfloor Preparation: Ensure the subfloor is level, smooth, and free from any defects. Any unevenness or gaps will be reflected in the finished floor.
- Moisture Barrier: Install a moisture barrier over the subfloor to prevent moisture damage to the wood.
- Underlayment: A layer of underlayment, such as foam or cork, provides cushioning and sound insulation, enhancing the comfort and noise reduction of the floor.
- Acclimation: Allow the pine flooring to acclimate to the room temperature and humidity for several days before installation. This prevents warping and shrinkage.
Installation Techniques
The installation process for pine flooring involves several steps:
- Laying the First Row: Start at a wall and lay the first row of planks, ensuring a tight fit and proper spacing.
- Securing the Planks: Secure the planks to the subfloor using staples, nails, or glue, depending on the chosen method.
- Cutting and Fitting: Cut planks to fit around obstacles and corners, ensuring a seamless and professional finish.
- Installing Subsequent Rows: Lay each subsequent row, staggering the joints to avoid weak points and enhance the visual appeal.
- Finishing Touches: Install transition strips and moldings to create a smooth and professional finish.
Finishing Options
After installation, pine flooring requires finishing to protect it from wear and tear and enhance its aesthetic appeal:
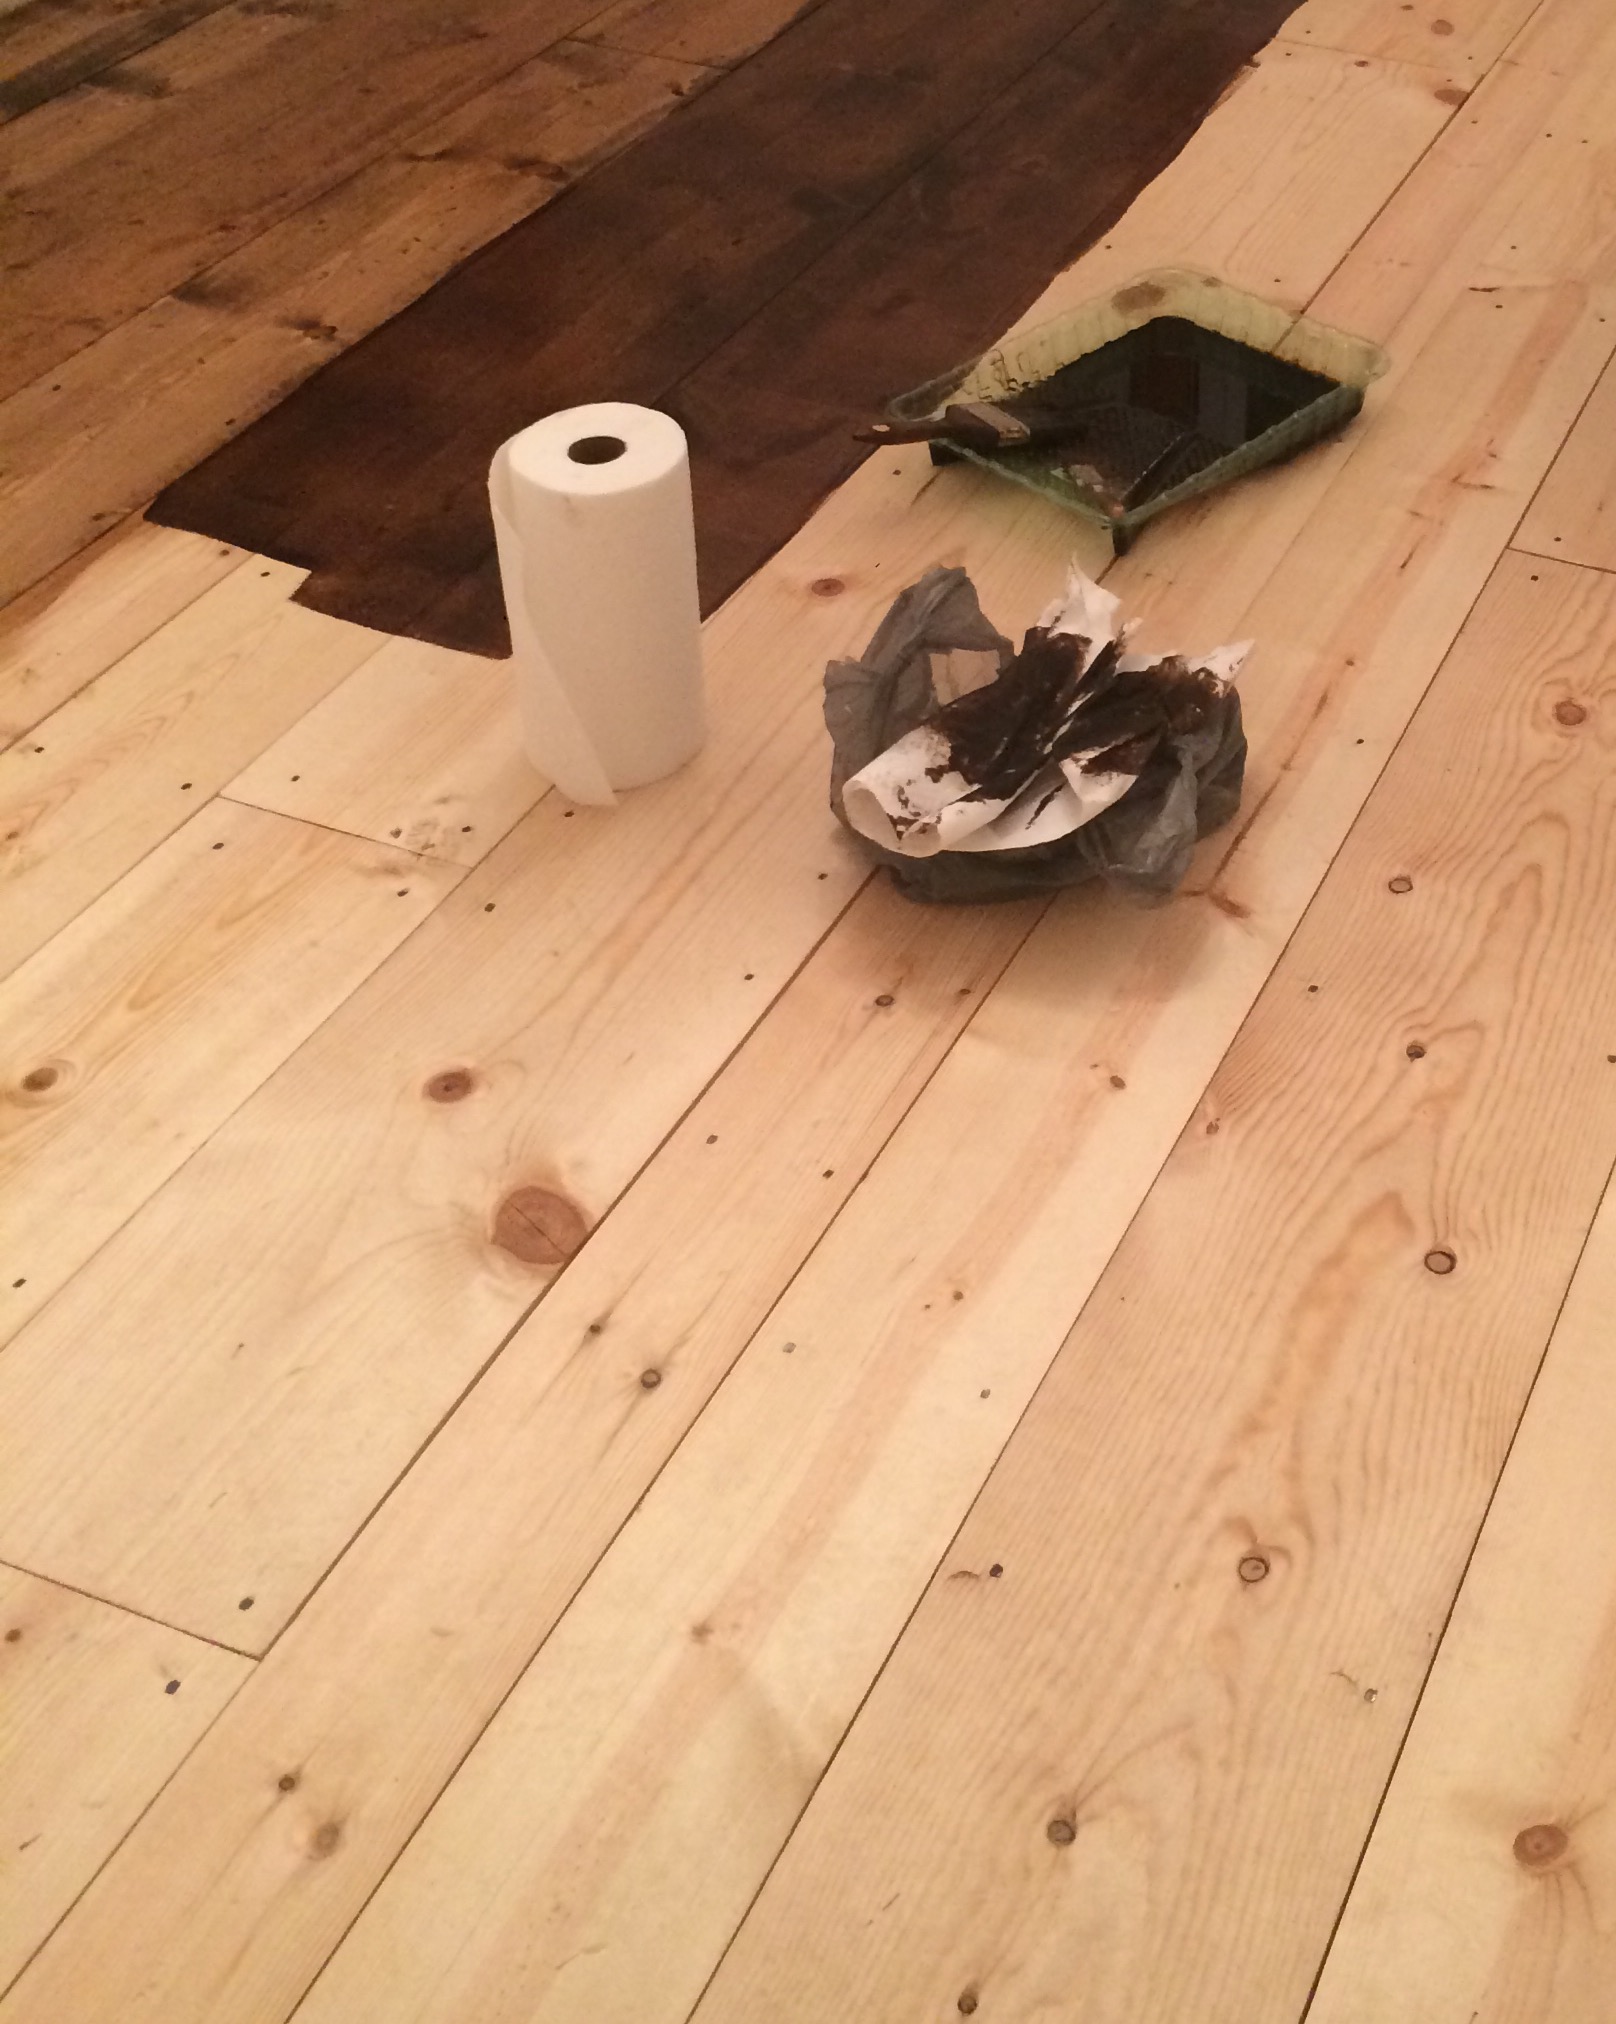
- Sanding: Sand the floor to achieve a smooth and even surface, removing any imperfections or rough edges.
- Staining: Apply a stain to enhance the natural beauty of the wood and create a desired color.
- Sealing: Apply a sealant to protect the floor from moisture, dirt, and stains, extending its lifespan.
- Polyurethane: A polyurethane coating provides a durable and protective finish, enhancing the floor’s resistance to scratches and wear.
- Wax: Waxing adds a protective layer and enhances the natural sheen of the wood, creating a warm and inviting finish.
DIY Pine Flooring Ideas
Beyond the traditional installation, DIY pine flooring offers endless creative possibilities:
- Distressed Look: Create a rustic and aged appearance by using a distressed finish, incorporating techniques like sanding, chipping, and staining.
- Whitewash Finish: Achieve a light and airy feel with a whitewash finish, creating a subtle contrast against the natural grain.
- Painted Flooring: Add a pop of color and personality by painting the pine flooring, creating a unique and vibrant space.
- Inlay Designs: Incorporate decorative inlays of different wood species or materials to create intricate patterns and designs.
- Stenciled Patterns: Apply stencils to create geometric or floral patterns on the pine flooring, adding a touch of elegance and sophistication.
FAQs on DIY Pine Flooring
-
Q: How long does it take to install pine flooring?
- A: The installation time varies depending on the size of the area, the complexity of the project, and the experience level of the installer. A typical DIY project can take several days to a week.
-
Q: What tools are needed for DIY pine flooring installation?
- A: Basic tools include a saw, hammer, tape measure, level, and flooring nailer or stapler.
-
Q: Can I install pine flooring over existing flooring?
- A: In some cases, it is possible to install pine flooring over existing flooring, but it requires careful assessment of the subfloor and the existing flooring’s condition.
-
Q: How do I care for pine flooring?
- A: Regular sweeping, vacuuming, and occasional mopping with a damp cloth are sufficient for maintaining pine flooring. Avoid harsh cleaners and abrasive scrubbers.
-
Q: What are the benefits of DIY pine flooring?
- A: DIY pine flooring offers significant cost savings compared to professional installation, a sense of accomplishment, and the freedom to customize the project to your specific needs and preferences.
Tips for Successful DIY Pine Flooring
- Plan Thoroughly: Before starting the project, carefully plan the layout, measure the space, and order the necessary materials.
- Seek Professional Guidance: If you are unsure about any aspect of the installation, consult with a professional for advice and guidance.
- Work in Sections: Install the flooring in sections, allowing each section to dry completely before moving to the next.
- Maintain a Consistent Level: Ensure that the planks are installed at a consistent level to prevent unevenness and gaps.
- Avoid Excessive Moisture: Allow the flooring to acclimate to the room’s humidity and temperature before installation, and avoid exposing it to excessive moisture during the project.
Conclusion
DIY pine flooring presents a rewarding opportunity to transform a space with warmth, character, and affordability. By carefully selecting materials, preparing the subfloor, and following proper installation techniques, homeowners can achieve a beautiful and durable floor that enhances the overall aesthetic and value of their home. Whether embracing a traditional look or exploring creative design ideas, pine flooring offers a versatile and timeless solution for any style and budget.


Closure
Thus, we hope this article has provided valuable insights into Embracing the Warmth and Versatility of DIY Pine Flooring. We appreciate your attention to our article. See you in our next article!